
CHOOSE THE RIGHT WOOD FOR YOU.
CASING: How do you select a size and pattern for casing?
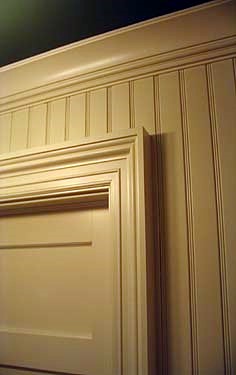
Choosing the casing is the primary and most important molding selection, as it frames all the doors and windows. There is usually more casing than any other molding and it is visible from almost everywhere in the home. It also determines to some degree the size of base and chair rail, as these moldings butt into the casing, requiring them to be slightly thinner and in proportion to the casing.
If you are painting, consider casing details which will provide shadow lines, such as beading, steps, channels, etc. Unless you want a very plain flat surface, outside of your paint color, the shadow lines and molding shape will be the only design feature.
A painted molding, being less expensive to purchase and install, means that you can consider a larger pattern that may have more visual impact. This is a consideration for all casings whether painted or not. Where a ¾” x 3 to 3 ½” molding might be a good overall casing size for 6‘8 doors and 8‘ ceilings, you might consider a full 1” x 4 to 4 ½” casing on the main floor, for featured openings such as a dining room or entryway, or around large doors and windows. Doors 7’0 or taller need a larger casing. Sometimes two sizes of the same casing pattern are used, large casing with tall doors on the main floor and smaller casing with standard size doors on the second floor, for example.
Another way to achieve the two sizes is to use the same casing on all openings, but in featured areas add a second molding that overlaps the first on the outside edge. This is called a backband or lip molding and requires a small area of flat on the outside face of the casing face. The backband should also provide a flat surface on its outer edge that meets the wall to receive the base at doorways. That flat surface should measure at least 1/8” more than the thickness of the base.
A good rule of thumb is to look at interior photos of molding and select your desired look. Before you spend too much time in the decision process, keep in mind that most people return to their original choices. While I might suggest looking for some shadow lines and pattern in a painted trim, a stained or clear-coated trim can best show off grain and color with simpler patterns.
BASE: How do you choose the size and pattern of your base molding?
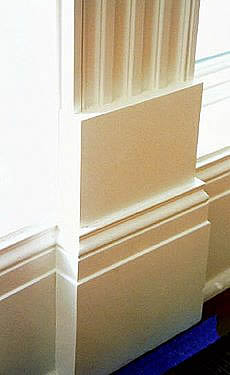
For overall size of base, we recommend maintaining a 3 to 5 ratio of casing to base. For example, if the casing is 3 ¼”, the base should be about 5 ½”. If the casing is 4 ¼”, the base would be 7”, and so on. If the base is butting into the casing at doorways, then hold the base thickness to 1/8” less than the casing, such that casings of ¾” thickness require a base of about 5/8” thickness. Note that most of our catalog base patterns are adjustable for thickness and width. An alternative to butting the casing into the base is to stand the vertical sides of the door casing on plinth blocks, which act as the stopping point of both casing and base. A plinth block should be a little taller (about ½”) than the base, about ¼” wider than the casing and at least an 1/8” thicker than either casing or base. Plinths can be plain blocks or incorporate profiles at their top.
Base patterns are often flat on the bottom 75% and have pattern only in the top 25%. This gives it a look of height and is less of a dust collector. This pattern can be a repeat of the inside of the casing pattern, but often is more effective to have a similar style, but not identical. A simple, but compatible base pattern allows the casing to stand out.
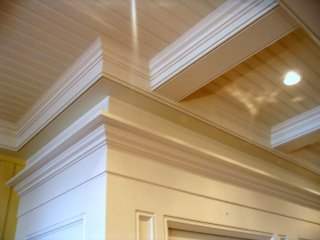
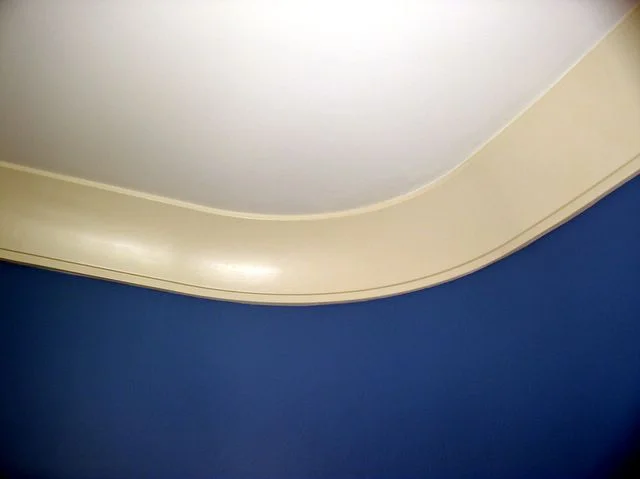
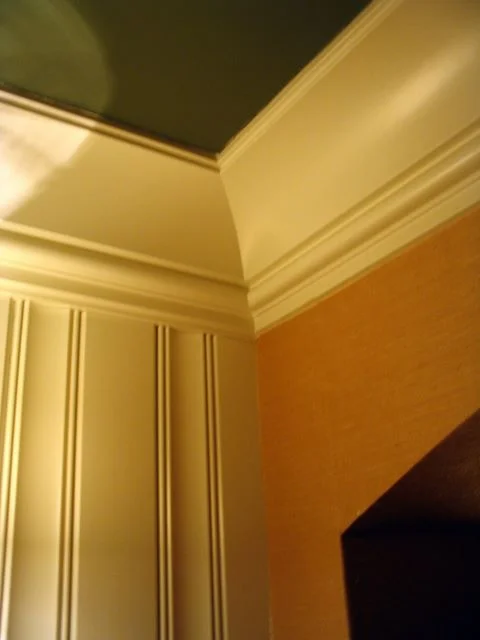
CROWN: Why use a crown molding?
Many homes do not have any crown, just a drywall corner.. Aesthetically, to look up at the ceiling and see nothing but ceiling is… anticlimactic.
A crown does add a decorative finish to wall and ceiling, lends a continuity to the interior spaces, and especially with patterns that have large coves, softens the sharp corners of the room.
How do you select a size for crown molding?
Crown molding draws the eye upward and creates a decorative transition from wall to ceiling, lends a continuity to the interior spaces, and softens the sharp corners of the room.
How do you select a size for crown molding?
Start with size. This is primarily a function of the ceiling height. Here are our suggestions for the proportion of ceiling height in feet to crown in inches (diagonally across the face of the crown):
8’- 2½ to 4”
9’- 4 to 6”
10’ -5” to 7”
12’- 7” to 9”
How do you select a pattern for crown molding?
A pattern that incorporates some of the casing design elements, or at least does not clash in style, is a good start. Again, painted moldings need some pattern to create shadow lines, while clear-coated finishes will show more grain with smoother, simpler patterns.
Let our sales staff assist you in your pattern choices, either by coming into one of our showrooms, or giving us a call.